Getting started with EZE.biz

| LISTS | PURPOSE |
|---|---|
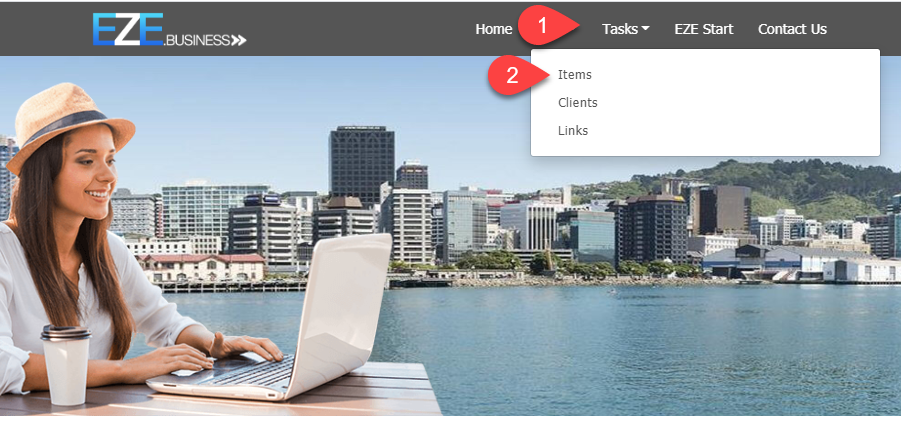
| Items | a list of goods or services you want to offer to your customers |
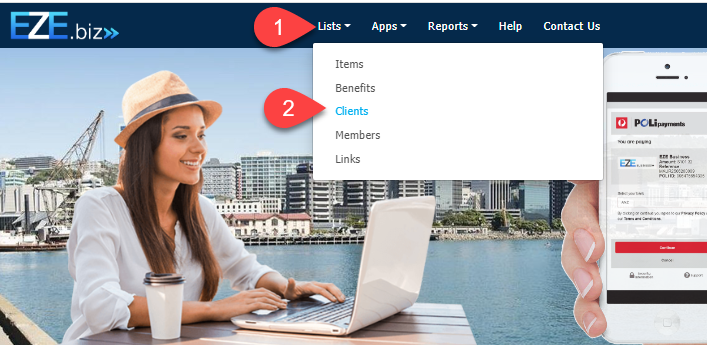
| Clients | a list of customers/contacts you have collected or sold to in the past that you would like to sell to |
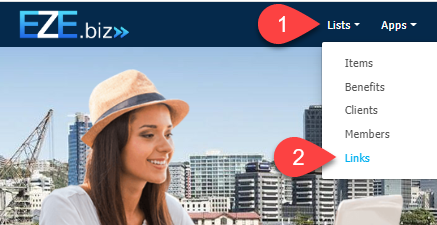
| Links | these are created by EZE.biz to direct emails, social media accounts to your shopping cart |

| APPS | TASKS |
|---|---|
| EZEpay | is designed for simple face-to-face or low volume point-of-sale type transactions for cash, internet or credit card customer payments |
| EZEinvoice | use this for creating a standard type invoice which can be emailed and the customer can pay on receipt using the EZE’s secure payment gateway by credit card or bank internet payment. |
| EZEshop | Use this to create your own shopping cart without the need of your own website. EZEshop will create a link that allows you to insert into an email or placed into a social media account so customers can be directed straight into your very own online shop. |
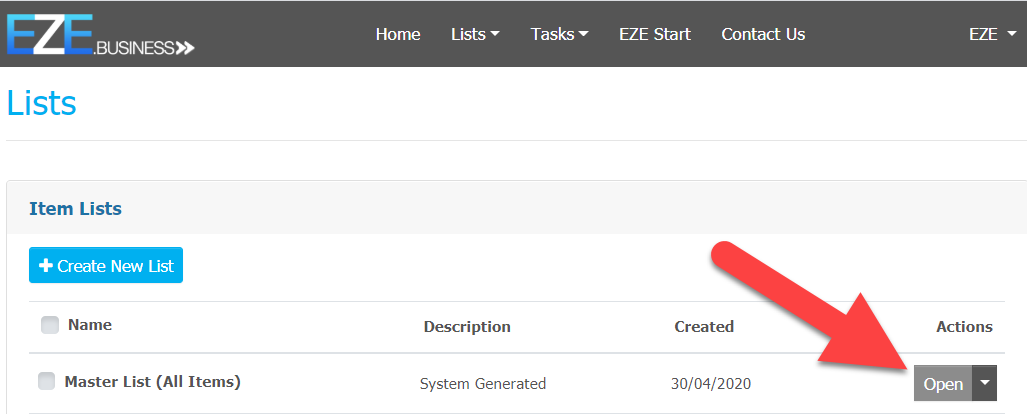
Lists

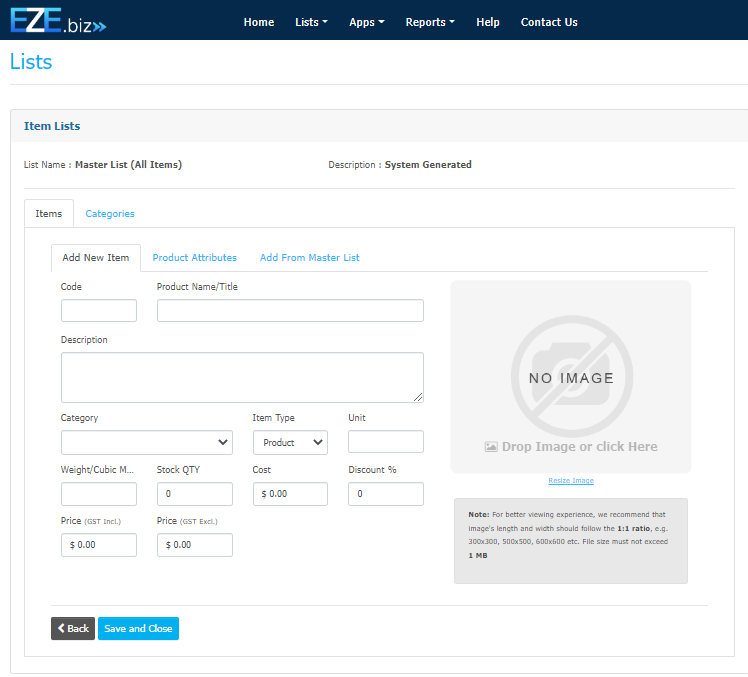
Graphics can be either dragged from another location such as your desktop or, by clicking on the Click Here line, you can find and open the graphic to upload it into your items list.
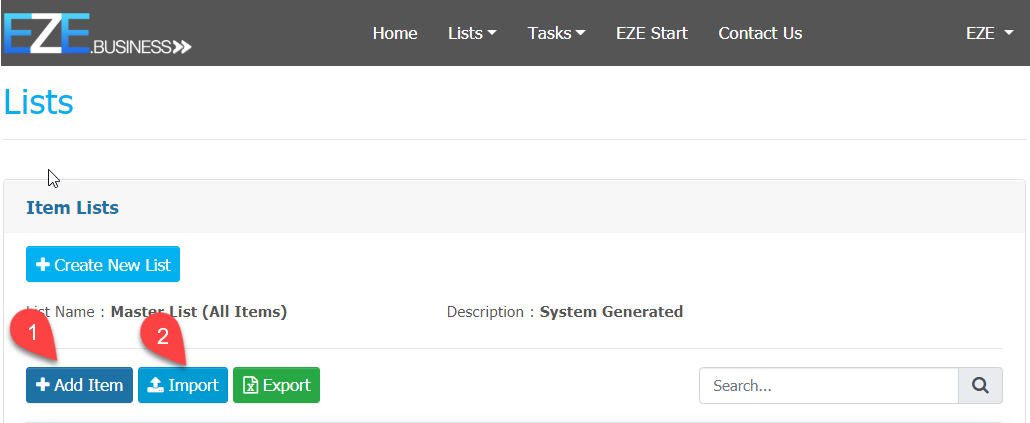
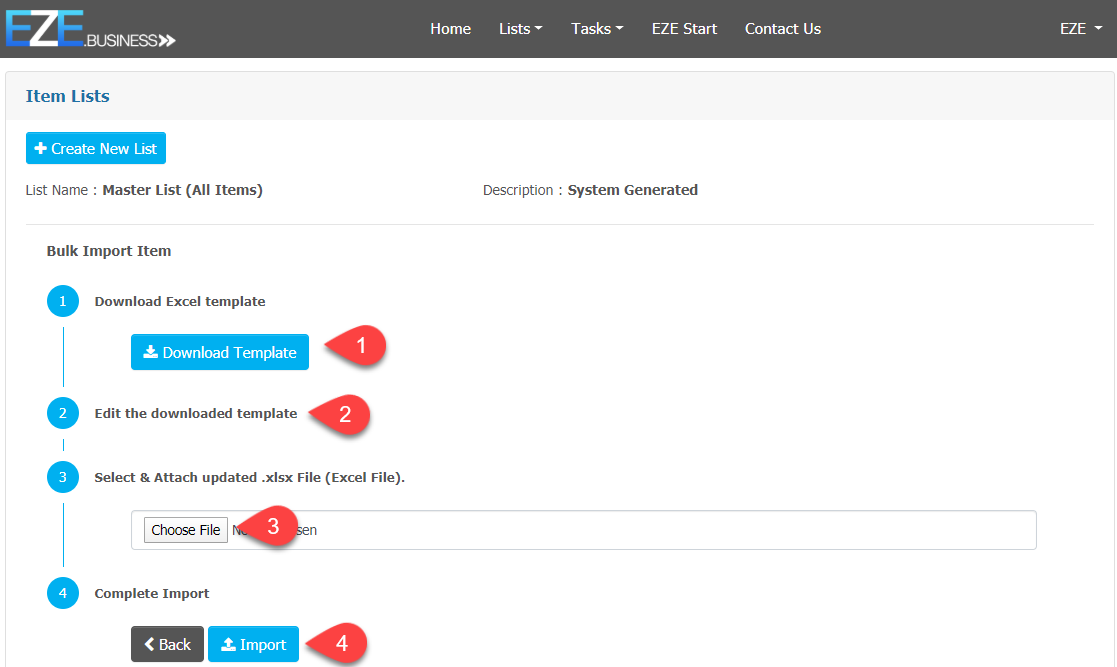
To ADD ITEMS in Bulk, use the IMPORT button and this screen will open.
Simply follow the Wizard to access a copy of the items template.
1. To download a copy of the Excel Items template. When you press the Download Template you will see the download process happening in the bottom left-hand corner of your screen. When it stops, if you select the small up arrow (1) this will open a menu to either, Open (2) the spreadsheet or (3) show in folder.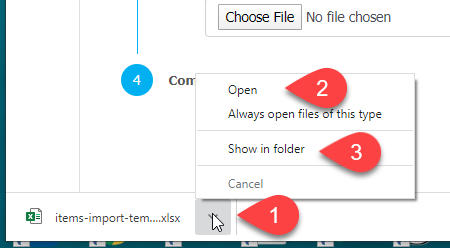
2. Enter all the details to create the completed List of Items you want to import, then save the completed spreadsheet to a location on your computer that will be easily found for the import process.
3. To import the completed List of Items from the spreadsheet, press the CHOOSE FILE button and locate your completed spreadsheet.
4. To import the completed list of items from the spreadsheet press the IMPORT button.
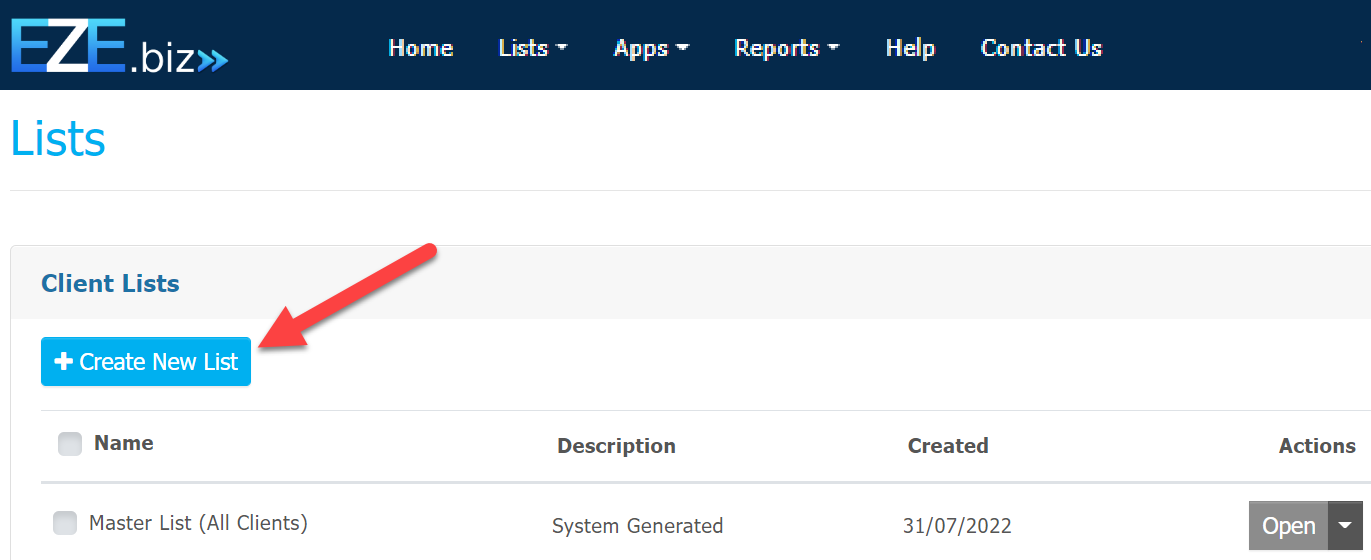
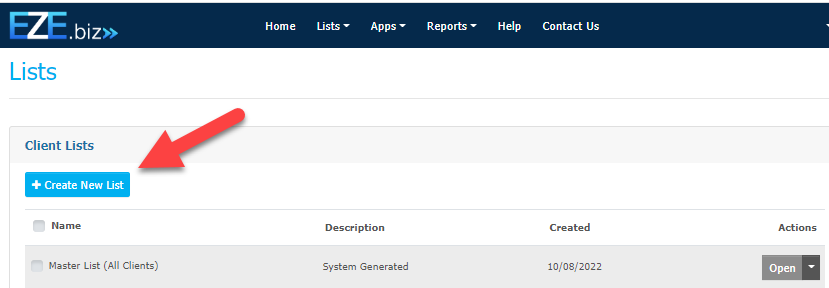
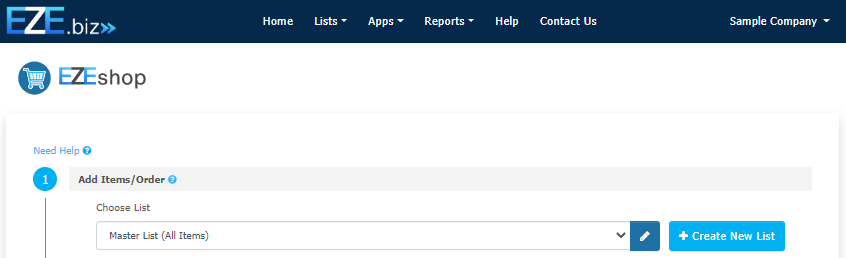
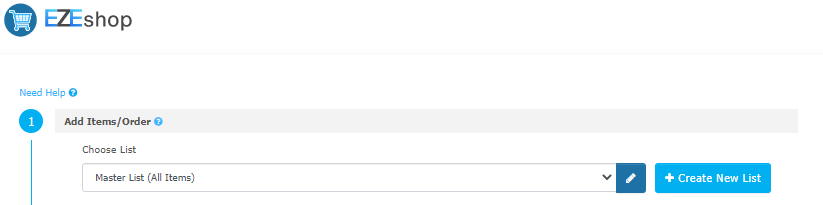
a. To create new list press LISTS menu the LISTS and then CREATE NEW LIST button.
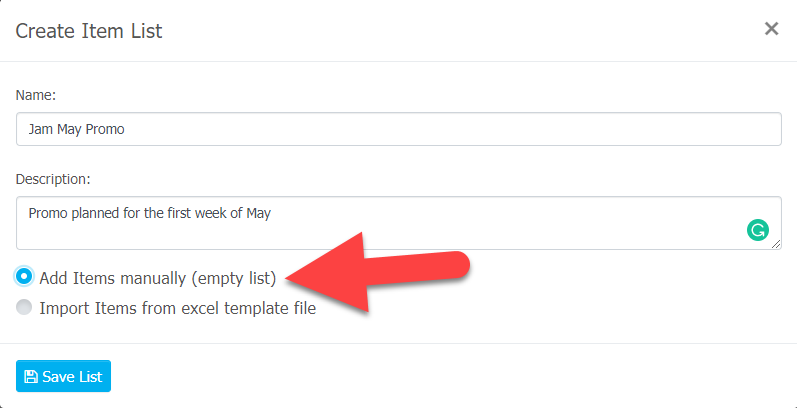
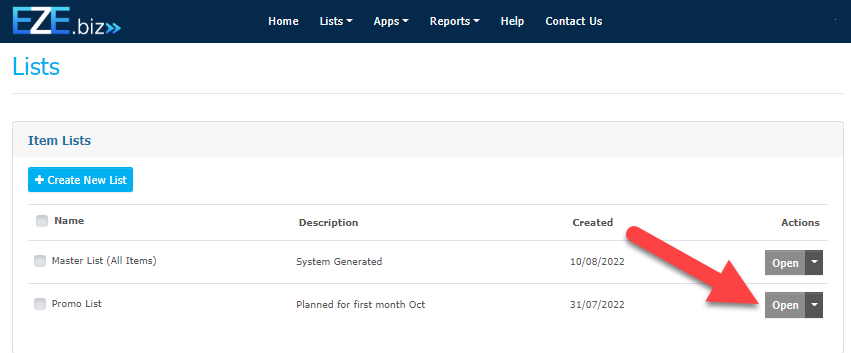

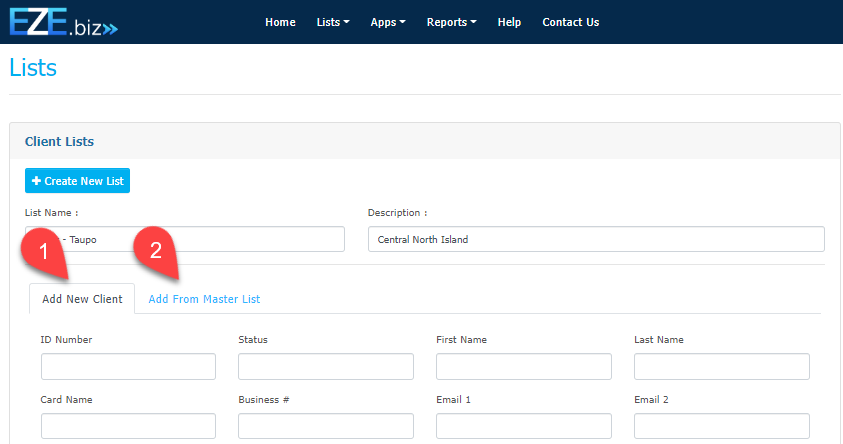
Here you have the option to add an Individual Item in the Open tab by remaining on Tab 1.
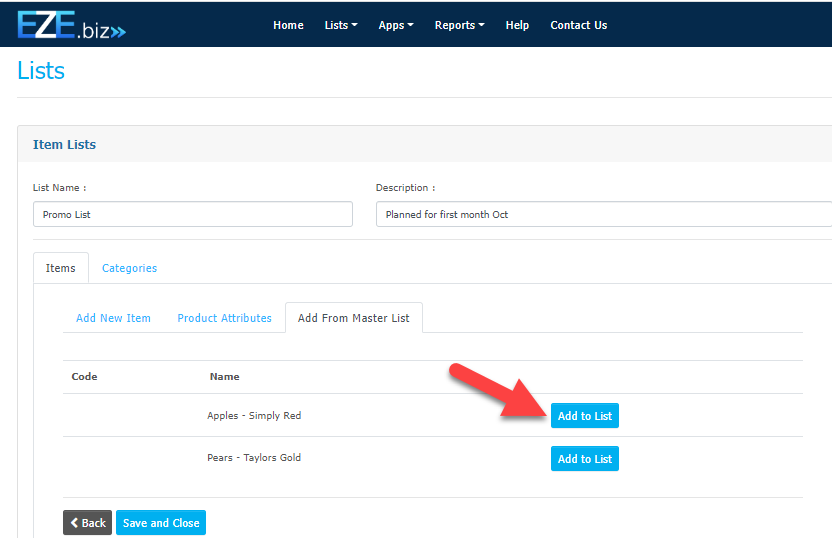
To select items from the Master List, go to Tab 2 as indicated.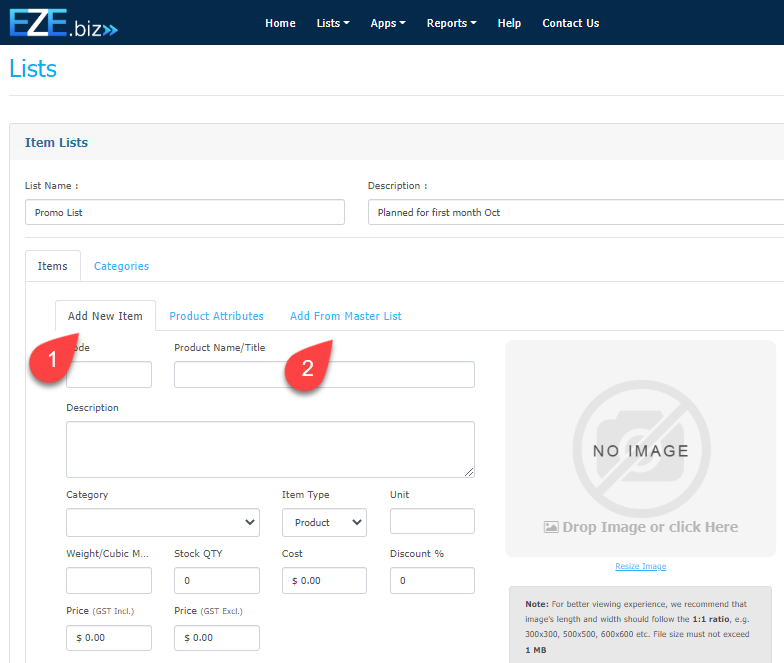

Introduction

Save and Close. You are ready to start selling!
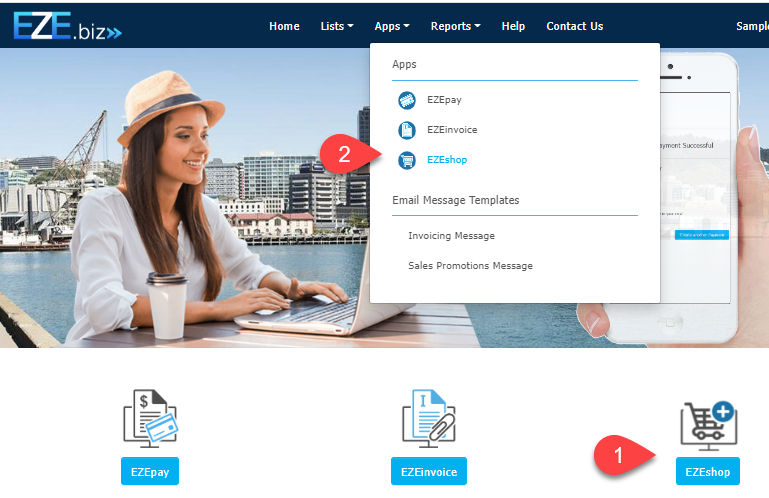
Next, select one of the following Apps.
Apps

Introduction
The Ezepay App allows the creation of a quick B2C (Business to Customer) cash sale type transaction when a customer walks through the door or when out on the job. This option is ideal if you don't have credit card or POLi pay options available for your customers.
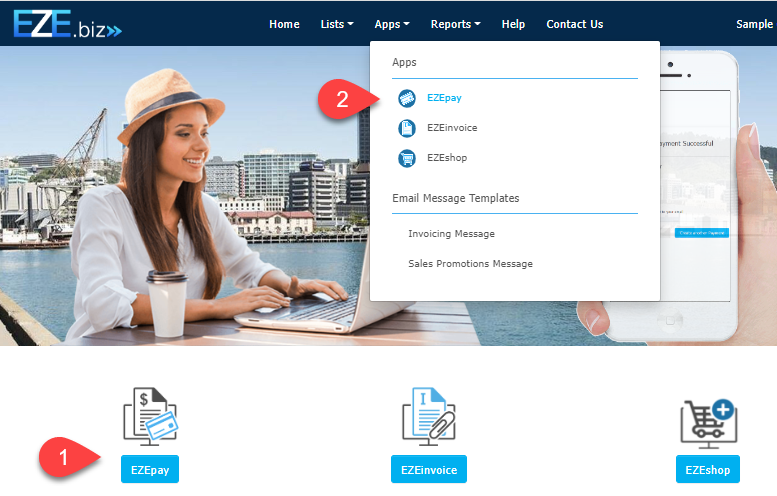
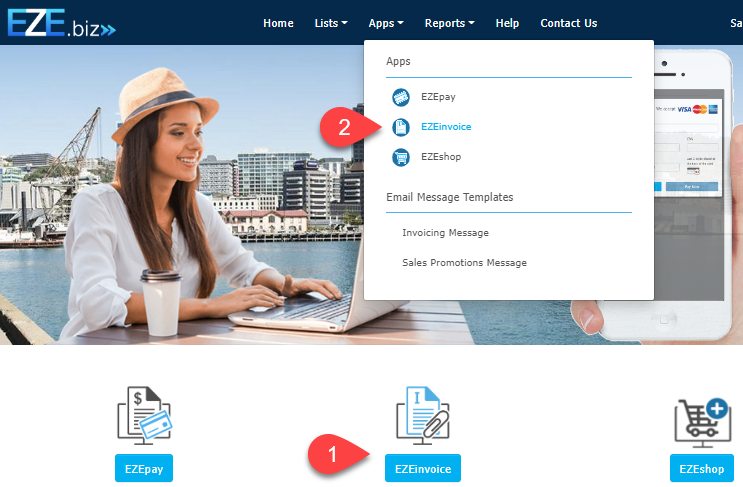
There are two ways you can access EZEpay:
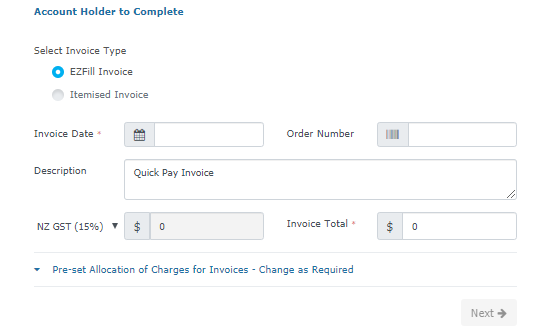
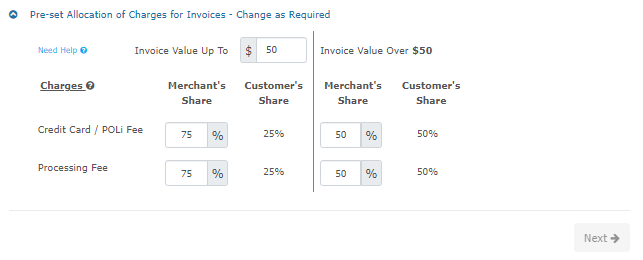
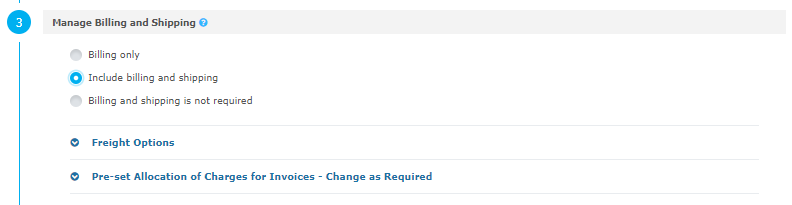
The "Pre-set Allocation of Charges for Invoices - Change as Required" is an optional facility. These settings can be pre-set at the time of registration to apportion the merchant and processing fees. These pre-set allocation determine the default how the credit card and processing get charged normally by the merchant but the default allocation can be changed by following the number steps can again be accessed by following the three numbered steps shown below.

However, there is also the flexibility to modify the default settings on an invoice by invoice basis. This unique feature is designed to allow the Account Holder the opportunity to apply all these processing fees onto the customer or elect to share all or some of those fees, depending on the type of sale and customer.
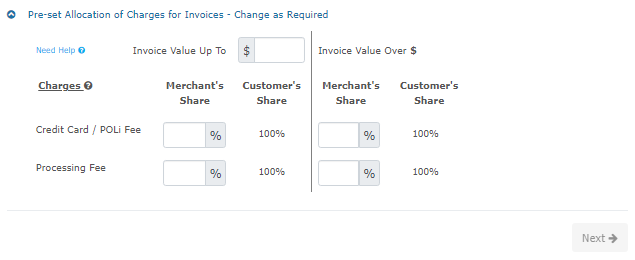
Here are two examples, but any variation on these themes can be made.
Example 1:
In this example the customer will be charged 100% of all charges on any valued invoice.

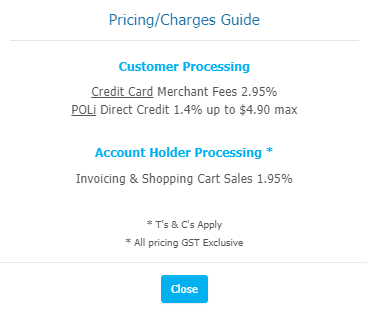
If you press the Charges? link this pop up will appear explaining the details of the current processing charges imposed by the credit card companies and for processing.

Example 2:
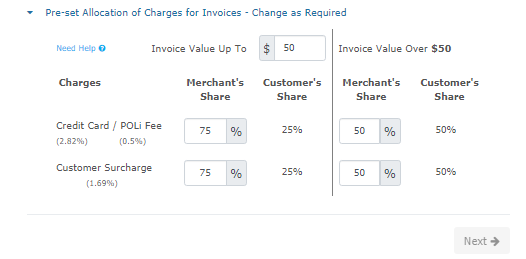
In this example the merchant (Seller/Account Holder) has decided that any invoices up to $50 (GST Incl.) in value the merchant will accept 75% of the charges and the customer 25%. However if the invoice value exceeds $50 , then the charges will be split 50/50.

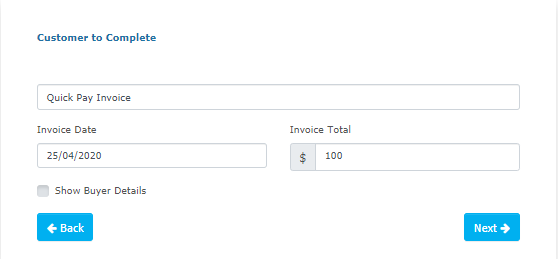
Press Next
You now have the option to bypass this screen if in a hurry, by simply pressing NEXT.
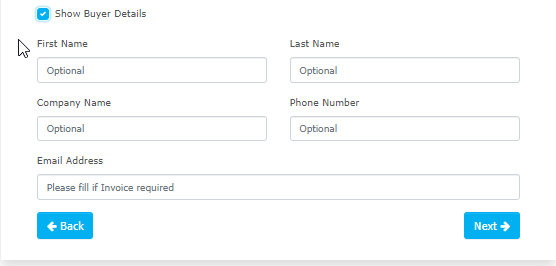
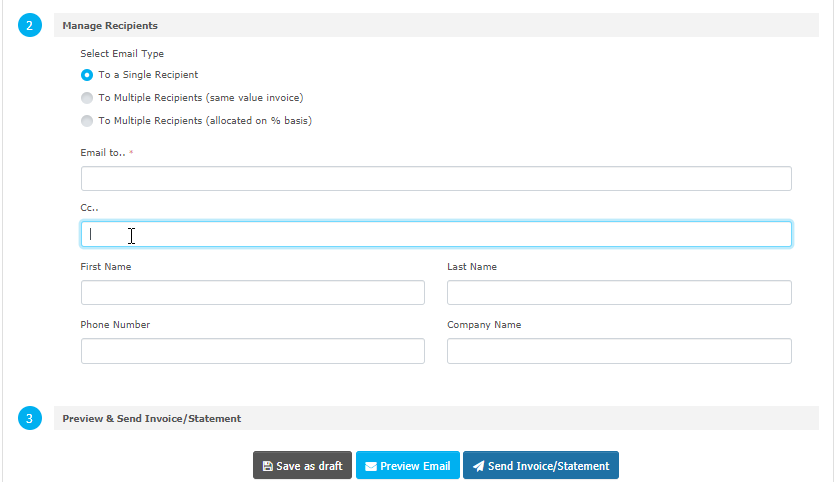
Enter customer details - Optional
If you want to record the customer names and details tick the "Show Buyer Details" box and the screen will extend to allow the customer to enter their own details.
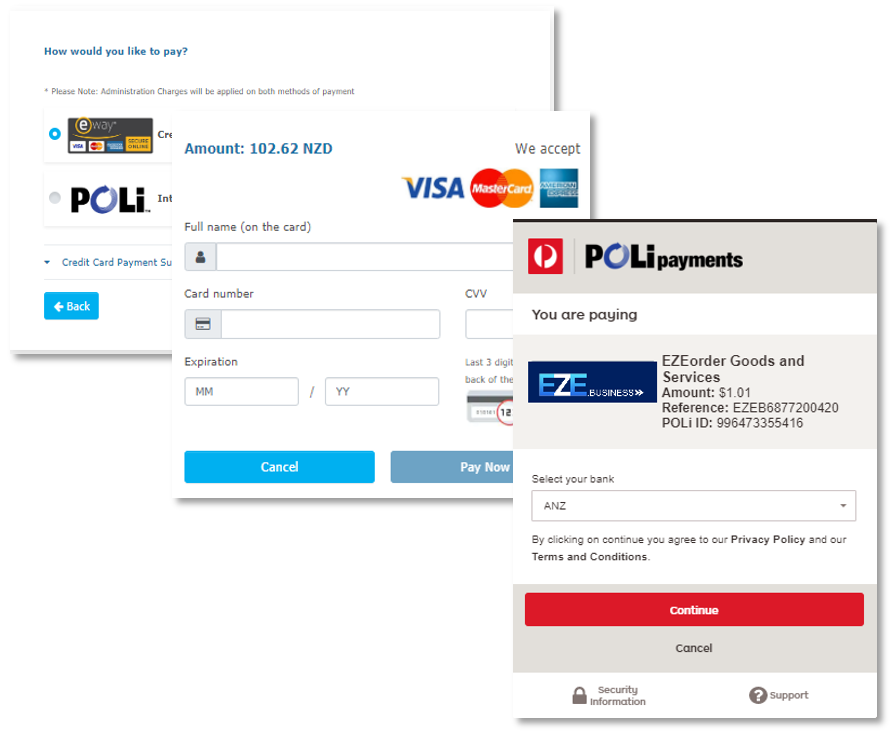
The customer is now given the choice of payment options. There are currently two options: (1) by credit card or (2) by gaining access to online banking. It's your customers’ choice and it’s possible this can be achieved by using your mobile phone to complete the transaction.

Introduction
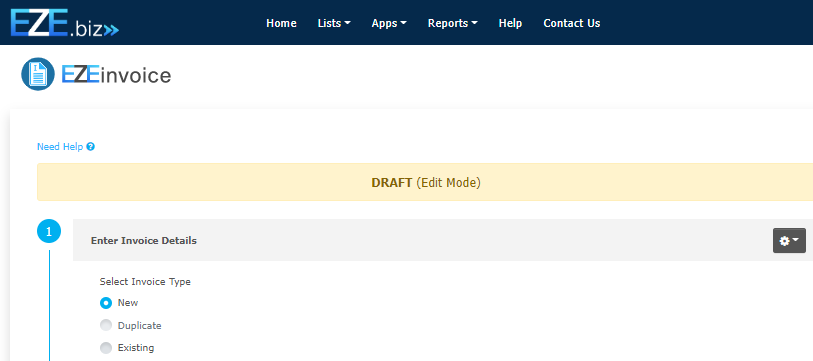
There are two ways to access EZEinvoice:
When opened there are three different types of invoice transactions you can perform in EZEinvoice:
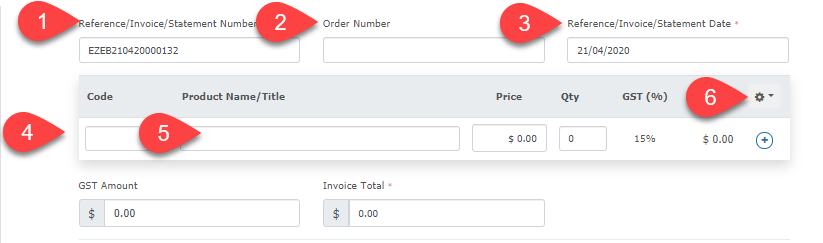
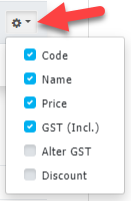
If you need to alter the GST rate for the likes of rest homes, or add a discount, then click on the small cog showing as number 6 above.

Here are two examples, but any variation on these themes can be made.
Example 1:In this example the customer will be charged 100% of all charges on any valued invoice.

If you press the Charges? link this pop up will appear explaining the details of the current processing charges imposed by the credit card companies and for processing.
Example 2:
In this example the merchant (Seller/Account Holder) has decided that any invoices up to $50 (GST Incl.) in value the merchant will accept 75% of the charges and the customer 25%. However, if the invoice value exceeds $50, then the charges will be split 50/50.
Press Next


Introduction

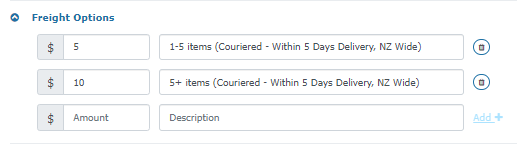
This is an example of what can be set up under the freight option
Pre-set Allocation of Charges
There is the flexibility to modify the default settings on a promotion-by-promotion basis. This unique feature is designed to allow the merchant (Account Holder) the opportunity to apply all these processing fees onto the customer or elect to share all or some of those fees, depending on the type of sale and customer.
Here are two examples, but any variation on these themes can be made.
Example 1:
In this example the customer will be charged 100% of all charges on any valued invoice.
If you press the Charges? link this pop up will appear explaining the details of the current processing charges imposed by the credit card companies and for processing.

Example 2:
In this example the merchant (Seller/Account Holder) has decided that any invoices up to $50 (GST Incl.) in value the merchant will accept 75% of the charges and the customer 25%. However if the invoice value exceeds $50, then the charges will be split 50/50.

Press Next
This step allows three types of communicating with your customers:
- Email Only – this is designed to send a simple email promotion to know customers, where you legitimately have obtained their email address.
- Email and Hyperlink - the same as 1 above but in additional when sending the email it will attach a hyperlink to your shopping cart list. That can either be your full product list or a restricted list of items you wanting to promote.
- Hyperlink only - this simple generate a hyperlink (link for short) for this promotion that you copy and add to a social media account like Facebook to promote your items but link them back to your shopping cart. Once you have created a hyperlink, this link is then filed into a library and available under the LIST menu as displayed below. You can access and copy that link into any correspondence or other social media account you may sign up for.
At this step you have the option to add some attachment to your email. This could be a flyer giving the customer additional information that is not on display in your shopping cart, like an assembly, how to care for your product, printable price list, in fact anything that will help your customers.
Ideally this should be prepared ahead of time so that when you get to this stage you know what you want to add and then simple find it and add it as an attachment.
If you need assistance to create a flyer for your business, do not hesitate to contact admin@eze.business.

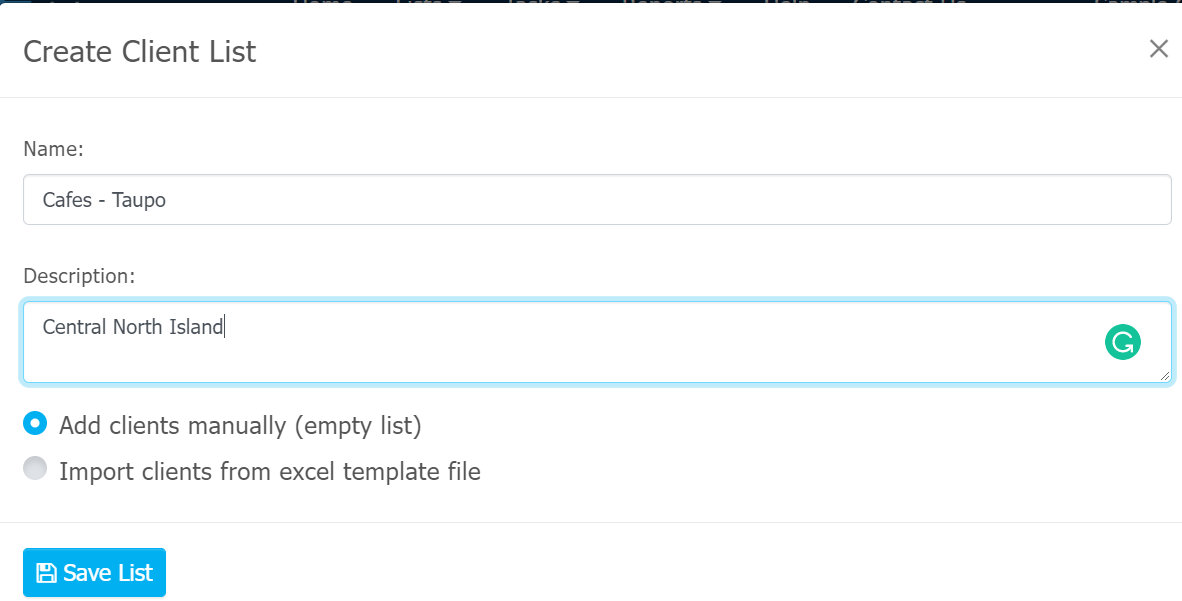
The next stage is to select the customers/client/members you want to send your promotion to. Select either your whole Master List of clients, or a special list of people or businesses you want to send the promotion to. To create the exclusive list choose the Create New List button.

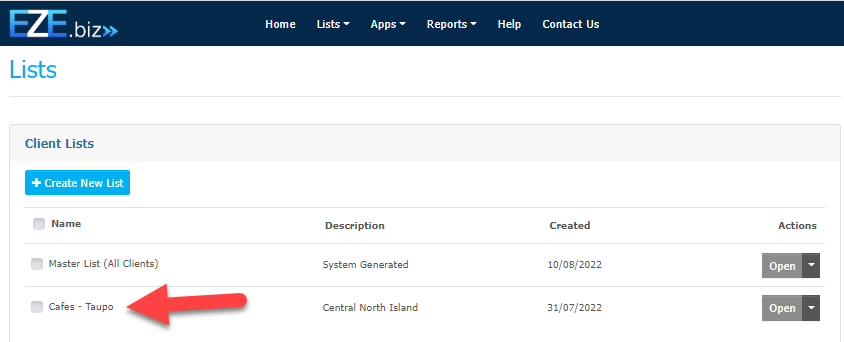
As you see in this example from the Master List a separate list of just the cafes in the Taupo region has been created from the Master List. So anytime the owners needs to target just the Taupo cafes they would select this list.

This almost last step and this step gives you the opportunity to review what you have put together before sending to potential customers.
All done, time to send your message on its way and reap the rewards of your effort. Here’s to many successful sales for your business and may pay lots of tax as that is a sign of a successful business and it supports our economy.

Stage 8 brings you to the point where you can now send out your promotion.
Please remember that what you have just created can be re-used again and again by simply updating any of the steps to make the necessary changes required for each individual promotion.
Happy Selling.
